Triple Your Storage: Add a Second NVMe SSD Guide
Adding a second NVMe SSD significantly enhances a computer’s storage capacity and performance, particularly beneficial for gamers and content creators requiring high-speed data access and substantial space for large files and applications.
In the realm of modern computing, storage is more than just space; it is the cornerstone of performance, especially for enthusiasts and professionals. The concept of how to Triple Your Storage: The Ultimate Guide to Adding a Second NVMe SSD delves into a crucial upgrade path that can dramatically transform your system’s capabilities. Beyond merely expanding capacity, integrating an additional NVMe SSD brings forth improvements in data transfer speeds, application loading times, and overall system responsiveness, creating a more seamless and efficient user experience. This guide will walk you through the intricacies of this upgrade, ensuring a smooth and beneficial transition.
understanding NVMe SSDs and their benefits
NVMe SSDs represent a significant leap forward in storage technology. Unlike traditional SATA SSDs or older hard disk drives, NVMe (Non-Volatile Memory Express) leverages the PCIe (Peripheral Component Interconnect Express) interface, which offers vastly superior bandwidth and lower latency. This translates directly into faster boot times, quicker application launches, and significantly reduced loading screens in games or large media files. For anyone seeking to optimize their system, understanding these core benefits is the first step.
The speed advantage: PCIe vs SATA
The difference between PCIe and SATA is monumental. SATA, initially designed for hard drives, maxes out at around 600 MB/s for SSDs. PCIe, on the other hand,
- Can deliver speeds ranging from 3,500 MB/s for Gen3 NVMe drives up to over 7,000 MB/s for Gen4, and even faster for Gen5.
- This exponential increase in speed is not just theoretical; it impacts every aspect of daily computing.
- From booting up your operating system to transferring multi-gigabyte files, the difference is immediately noticeable and profoundly impactful on productivity and enjoyment.
Why a second NVMe? Beyond capacity
While increasing storage capacity is an obvious benefit of adding a second NVMe SSD, the advantages extend much further. A second drive can serve multiple purposes: a dedicated drive for your operating system and critical applications, leaving your primary drive for games or large creative projects. This separation can enhance performance by reducing contention for drive resources, ensuring that your most demanding tasks always have access to the fastest possible storage. For gamers, this means installing game libraries on a separate NVMe for ultra-fast loading.
Another strategic use case is for content creators. Video editing, 3D rendering, and graphic design involve working with massive files that benefit immensely from high-speed storage. A second NVMe can be used as a scratch disk or a dedicated drive for active projects, preventing bottlenecks and accelerating workflows. This optimization ensures that processing power is not wasted waiting for data to be read from or written to storage, proving that a second NVMe is not just about having more space, but about optimizing your entire system’s potential.
In summary, embracing NVMe technology, especially with multiple drives, elevates a computing experience from merely functional to exceptionally performant. The underlying architecture provides a robust foundation for demanding applications and offers a future-proof solution for evolving hardware needs, making it an indispensable upgrade for any serious user.
compatibility check: ensuring your system is ready
Before diving into purchasing and installing a second NVMe SSD, a thorough compatibility check is paramount. Not all motherboards are created equal, and understanding your system’s limitations and capabilities is crucial for a smooth upgrade process. This section will guide you through identifying the necessary components and confirming your system’s readiness.
Motherboard M.2 slots and PCIe lanes
The first step is to inspect your motherboard for available M.2 slots. Most modern motherboards come with at least one, often two, or even three M.2 slots. However, the presence of a slot doesn’t automatically guarantee full compatibility or optimal performance.
- You need to determine if the available slots support NVMe (or just SATA M.2).
- More critically, you must understand the PCIe lane allocation.
- Each NVMe SSD requires a certain number of PCIe lanes (typically x4) to operate at its maximum speed.
Some motherboards share PCIe lanes between M.2 slots, SATA ports, or other expansion slots. For instance, populating a second M.2 slot might disable a couple of SATA ports or reduce the speed of your primary GPU slot. Consulting your motherboard’s manual is indispensable here to understand these nuances. It will clearly outline the configuration possibilities and any shared resources to avoid unpleasant surprises.
NVMe sizes and form factors (2280, 2242, 22110)
NVMe SSDs come in various form factors, denoted by a four or five-digit number. The most common is 2280, meaning 22mm wide and 80mm long. Other sizes include 2242, 2260, and 22110. Your M.2 slot will have a screw hole that supports one or more of these lengths. Ensure the NVMe SSD you purchase matches the supported length of your available M.2 slot. While most slots are designed for 2280, checking for compatibility prevents you from buying a drive that won’t physically fit or be secured.
BIOS/UEFI settings and firmware updates
Once the hardware is confirmed, considerations shift to the software and firmware aspects. Your motherboard’s BIOS/UEFI settings play a role in how NVMe drives are detected and utilized.
- Ensure your BIOS is up to date, as newer versions often improve NVMe compatibility and performance.
- Sometimes, enabling specific NVMe or PCIe settings in the BIOS might be necessary, though modern boards often auto-detect.
- Consulting your motherboard’s manual for recommended BIOS settings is advisable.
Some older systems might require additional drivers or firmware updates for the NVMe drive itself. While generally plug-and-play, keeping drivers updated ensures optimal performance and stability. This proactive approach to compatibility checking ensures a smooth installation and maximum utilization of your new NVMe SSD, turning what could be a headache into a straightforward upgrade.
selecting the right NVMe SSD
Choosing the appropriate NVMe SSD for your second slot involves balancing performance, capacity, and cost. With a multitude of options available, making an informed decision can seem daunting. This section will break down the key factors to consider, helping you select a drive that perfectly complements your system and usage patterns.
PCIe generations: Gen3, Gen4, and Gen5
The most significant differentiator among NVMe SSDs is their PCIe generation.
- PCIe Gen3 drives offer excellent performance for most users, with speeds up to 3,500 MB/s. They are also the most affordable.
- PCIe Gen4 drives, common in newer systems, push speeds up to 7,000 MB/s or higher, offering a noticeable boost for demanding applications and large file transfers.
- PCIe Gen5 is the bleeding edge, boasting speeds exceeding 10,000 MB/s.
Your motherboard dictates the maximum PCIe generation it supports. Buying a Gen5 drive for a Gen3 motherboard will work, but the drive will operate at Gen3 speeds, effectively wasting potential. Conversely, a Gen3 drive in a Gen4 slot will also operate at Gen3 speeds. Match the drive’s generation to your motherboard’s capabilities to maximize performance per dollar. Consider your current system’s capabilities and your future upgrade plans when making this choice. If you anticipate upgrading your CPU and motherboard in the near future, investing in a Gen4 or even Gen5 drive could be a worthwhile long-term decision.
Capacity and endurance: Terabytes vs. gigabytes
Determining the right capacity involves assessing your current and future storage needs. For a second NVMe, common capacities range from 500GB to 2TB or even larger.
- If you’re using it primarily for games, 1TB or 2TB might be ideal.
- For content creation projects, 4TB or more might be necessary.
Endurance, measured in Terabytes Written (TBW) or Drive Writes Per Day (DWPD), indicates how much data can be written to the drive before its warranty or expected lifespan is exceeded. Higher TBW values are crucial for tasks involving frequent writes, like video editing. For average users, most consumer-grade NVMe drives offer ample endurance, but it’s a critical specification for power users.
Heatsinks and thermal management
High-performance NVMe SSDs, especially Gen4 and Gen5 drives, can generate significant heat under sustained load. This heat can lead to thermal throttling, reducing the drive’s performance to prevent damage. Many motherboards now include integrated heatsinks for their M.2 slots. If your motherboard lacks one, or if you’re pushing the drive hard, consider an NVMe SSD that comes with a pre-installed heatsink, or purchase an aftermarket one. Effective thermal management ensures your NVMe SSD maintains optimal performance, preventing speed degradation during intensive operations. This attention to detail in selection contributes significantly to the longevity and consistent performance of your storage solution.
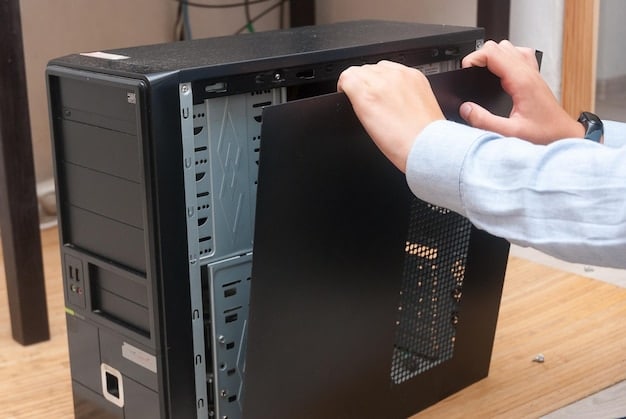
The DIY installation process: a step-by-step guide
Installing a second NVMe SSD is a relatively straightforward process for anyone comfortable opening their PC case. This section provides a clear, step-by-step guide to ensure a smooth and successful installation.
Pre-installation checklist: Tools and precautions
Before you begin, gather the necessary tools and take essential precautions:
- A Phillips head screwdriver is usually all you’ll need.
- An anti-static wrist strap is highly recommended to prevent electrostatic discharge (ESD) damage to your components.
- Work on a clean, stable surface, and avoid carpeting.
- Power down your computer completely and unplug it from the wall outlet.
- Press the power button a few times to drain any residual charge from the system.
Opening your PC case should only be done after disconnecting all power sources. Safety first is not just a cliché but a necessity when working with delicate electronic components. Ensure adequate lighting to clearly see the M.2 slots and screw holes.
Locating the M.2 slot and physical installation
Once your PC case is open, locate the available M.2 slot(s) on your motherboard. They are typically elongated slots, often near the CPU or graphics card, and may be covered by a heatsink shroud.
- If there’s a pre-installed heatsink, you’ll need to unscrew it first.
- Carefully remove the small M.2 screw (and sometimes a stand-off) from the end of the slot.
- Gently slide the NVMe SSD into the M.2 slot at a slight angle (around 30 degrees). It should slide in without excessive force.
- Once fully seated, the drive will lie flat. Gently press down on the end of the drive that has the notch and secure it with the screw you removed earlier.
If your motherboard came with an M.2 heatsink, reattach it over the newly installed NVMe SSD. Ensure the thermal pad, if present, makes good contact with the drive. This process is generally intuitive, but referring to your motherboard’s manual for specific slot locations and installation procedures can always be helpful.
post-installation: BIOS/UEFI and OS detection
After physically installing the NVMe SSD, close your PC case and reconnect all power cables. Boot up your computer and immediately enter the BIOS/UEFI settings.
- The new NVMe drive should be detected under storage devices or M.2 configuration.
- Verify it’s recognized.
- Once confirmed, save your BIOS settings and exit.
Upon booting into your operating system (Windows, Linux, etc.), the NVMe SSD will likely not appear in “This PC” or “My Computer” immediately. You’ll need to initialize and format the drive. On Windows, search for “Disk Management.” Your new drive will appear as unallocated space. Right-click on it, select “Initialize Disk,” then “New Simple Volume,” and follow the prompts to assign a drive letter and format it. Once formatted, your new NVMe SSD will be ready for use, tripling your storage and boosting your system’s performance.
Optimizing your new storage: configuration and management
Installing a second NVMe SSD is just the beginning. To truly leverage its potential, proper configuration and ongoing management are essential. This section covers various strategies to optimize your new storage, ensuring maximum performance and longevity.
Partitioning and file system choices
Once your new NVMe SSD is recognized by the operating system, the next step is to prepare it for use.
- For Windows, you’ll typically use NTFS as the file system.
- Linux users might opt for EXT4 or Btrfs.
Consider partitioning the drive. For many users, a single large partition is sufficient. However, you might create multiple partitions for different purposes, such as one for games and another for creative projects. This can help with organization and, in some cases, simplify backups. When formatting, perform a quick format for SSDs; a full format is not necessary and can contribute to unnecessary wear.
Strategic data allocation: OS, games, and creative projects
The true power of having a second NVMe lies in strategic data allocation.
- If your primary NVMe holds your operating system, consider dedicating the second drive entirely to your game library. Gaming benefits immensely from fast loading times, and having all your titles on a dedicated high-speed drive ensures optimal performance.
For content creators, the second NVMe can serve as a project drive, an external scratch disk, or even a dedicated cache drive for video editing software. Storing active work files on a separate, fast drive dramatically speeds up rendering, saves times, and overall workflow efficiency. This separation also provides a layer of resilience; if one drive experiences issues, your other data remains unaffected.

Monitoring and maintenance: SMART and TRIM
Regular monitoring and maintenance are crucial for the health and longevity of your NVMe SSDs.
- Utilize S.M.A.R.T. (Self-Monitoring, Analysis, and Reporting Technology) tools, often built into drive utility software, to monitor the drive’s health status, temperature, and wear levels.
- Keep an eye on the drive’s temperature, especially under heavy loads, to prevent thermal throttling.
Ensure that TRIM is enabled in your operating system. TRIM is a command that helps SSDs manage cached data more efficiently, preventing performance degradation over time. Most modern operating systems enable TRIM by default for SSDs, but it’s worth verifying. By proactively managing your new NVMe, you ensure it continues to deliver peak performance and reliability, making the most of your investment.
Troubleshooting common issues
Even with careful planning, unexpected issues can arise during or after the installation of a second NVMe SSD. Knowing how to diagnose and troubleshoot these common problems can save you considerable time and frustration. This section outlines typical challenges and their solutions.
Drive not detected in BIOS/OS
If your newly installed NVMe SSD isn’t showing up in the BIOS or operating system, several factors could be at play.
- Physical Connection: Recheck that the drive is fully seated in the M.2 slot and that the retaining screw is properly tightened. A loose connection is a frequent culprit.
- BIOS Settings: Enter your BIOS/UEFI. Some motherboards require specific M.2 slots to be enabled, or they might share PCIe lanes with other components that need to be disabled for the NVMe to function. Look for settings related to “M.2,” “NVMe,” or “PCIe configuration.”
- Compatibility: Double-check your motherboard’s manual to confirm the M.2 slot supports NVMe drives (some only support SATA M.2) and that the drive’s PCIe generation is compatible (even if it runs at a lower speed).
- Drivers/Firmware: While less common for initial detection, ensure your motherboard’s BIOS/UEFI firmware is updated to the latest version. This can sometimes resolve compatibility issues with newer NVMe drives.
If the drive is detected in BIOS but not in the OS, it likely needs to be initialized and formatted via Disk Management (as discussed in Unit 4). This is a common oversight and simple to resolve.
Performance drops and thermal throttling
Experiencing lower-than-expected speeds or sudden performance drops often points to thermal throttling. High-performance NVMe drives can generate significant heat, especially under sustained heavy loads.
- Heatsink: Verify that your NVMe drive has adequate cooling. If your motherboard includes an M.2 heatsink, ensure it’s properly installed and making good contact with the drive via a thermal pad. If not, consider purchasing an aftermarket heatsink.
- Airflow: Improve case airflow to dissipate heat more effectively. Positioning case fans strategically can help.
- Workload: If you’re constantly performing extreme write operations, consider if your drive’s endurance (TBW) is sufficient for your workload. While thermal throttling is more common, a drive nearing its endurance limit might also show performance degradation.
Monitoring drive temperature using tools like HWMonitor or CrystalDiskInfo can help identify if thermal issues are the root cause of performance problems.
Data corruption and system instability
While rare, data corruption or system instability after an NVMe installation can be alarming.
- Power Delivery: Ensure your power supply unit (PSU) is capable of handling the additional load. While NVMe drives are power-efficient, an old or underpowered PSU could contribute to instability.
- Driver Conflicts: Though less common with modern OS, consider if any pre-existing storage drivers are conflicting. A clean install of Windows or Linux, if all else fails, can rule out software conflicts.
- Defective Drive: In rare cases, the NVMe SSD itself might be faulty. If all other troubleshooting steps fail, consider testing the drive in another compatible system or contacting the manufacturer for an RMA (Return Merchandise Authorization).
Always back up critical data before performing hardware upgrades. This proactive step ensures that even in the worst-case scenario, your valuable information remains safe and recoverable. System instability issues can be complex, often requiring a systematic approach to narrow down the cause from hardware to software.
Future-proofing your storage: looking ahead
As technology continues to advance at a rapid pace, it’s wise to consider how to future-proof your storage solutions. Investing in a second NVMe SSD is a significant step, but understanding upcoming trends can help you make even smarter decisions for long-term scalability and performance.
PCIe Gen5 and beyond: The next generation of speed
PCIe Gen5 NVMe SSDs are already making their way into the market, offering theoretical speeds up to 14,000 MB/s or more. While Gen4 is currently the sweet spot for performance and accessibility, Gen5 will become the new standard for high-end systems in the coming years. When considering future upgrades, opting for a motherboard that supports PCIe Gen5 can extend its lifespan, allowing you to upgrade your NVMe drives without needing a new mainboard. This forward-thinking approach ensures you’re ready for the next wave of computing demands.
Storage technologies: QLC, TLC, and new memory types
The type of NAND flash memory used in SSDs significantly impacts their performance, endurance, and cost.
- TLC (Triple-Level Cell) NAND has been the workhorse for most consumer SSDs, offering a good balance of performance and endurance.
- QLC (Quad-Level Cell) NAND packs even more data into each cell, resulting in higher capacities at lower costs, but often with reduced endurance and sometimes slower write speeds, especially after the SLC cache is exhausted.
For a second NVMe, particularly for high-write applications like video editing, a TLC-based drive might be preferable for its higher endurance. For general storage of games and media files, QLC drives offer excellent value. Research into new memory types beyond traditional NAND, such as HBM (High Bandwidth Memory) or persistent memory, promises even faster and more efficient storage solutions, potentially revolutionizing how data is handled and accessed in the future.
The rise of direct storage API and game optimization
Modern gaming is pushing storage technology to its limits. Microsoft’s DirectStorage API, compatible with NVMe SSDs, is designed to dramatically reduce game loading times and improve asset streaming by allowing the GPU to directly access compressed game data on the SSD, bypassing the CPU.
- This technology ensures that high-resolution textures and complex game worlds can load almost instantaneously, eliminating loading screens as we know them.
The development of similar technologies across other platforms underscores the importance of fast storage for next-generation gaming experiences. For gamers, having a high-speed NVMe SSD is no longer just a luxury but a crucial component for taking full advantage of new game optimizations, ensuring you’re ready for the most immersive and seamless gaming experiences imaginable.
Investing in multiple NVMe SSDs today aligns perfectly with these future trends, preparing your system for the increasing demands of modern software and content. This strategic planning ensures your current upgrade continues to deliver exceptional value and performance for years to come.
| Key Point | Brief Description |
|---|---|
| 🚀 Speed Advantage | NVMe PCIe offers significantly faster data transfer than SATA, reducing load times. |
| ✅ Compatibility Check | Verify motherboard M.2 slots, PCIe lanes, and form factor for proper fit and function. |
| 🛠️ Easy Installation | A straightforward DIY process with basic tools and careful handling. |
| ✨ Optimization | Strategic data allocation and regular monitoring ensure peak performance and longevity. |
frequently asked questions
▼
While a second NVMe primarily adds storage, it can indirectly speed up your computer. By offloading large games or creative projects to a dedicated NVMe, your primary drive remains free for the OS and critical applications, reducing bottlenecks and improving overall responsiveness. This strategic separation optimizes data flow, making tasks like loading games or editing videos significantly faster without directly increasing CPU or RAM speed.
▼
For high-performance NVMe SSDs, especially PCIe Gen4 and Gen5 drives, a heatsink is highly recommended. These drives can generate considerable heat under sustained loads, leading to thermal throttling where the drive reduces its speed to prevent overheating. Most modern motherboards include integrated M.2 heatsinks, but if yours doesn’t, consider purchasing an aftermarket one to ensure optimal and consistent performance.
▼
No, an NVMe SSD requires an M.2 slot that supports PCIe (NVMe) protocol. If your motherboard’s M.2 slot is specifically only for SATA M.2 drives, an NVMe SSD will not function. Always consult your motherboard’s manual to confirm the type of M.2 slot(s) available and their supported protocols (SATA, PCIe, or both) before purchasing an NVMe drive to ensure compatibility.
▼
Potentially, yes. Some motherboards share PCIe lanes between M.2 slots and traditional SATA ports or other PCIe expansion slots. Populating an M.2 slot with an NVMe might disable one or more SATA ports or slow down a PCIe slot. Check your motherboard’s manual specifically for “shared lanes,” “M.2 configuration,” or “SATA Express” sections to understand any potential conflicts before installation.
▼
The best utilization depends on your primary computing needs. For gamers, dedicating it to your game library provides blazing-fast loading times. For content creators, using it as a dedicated drive for active projects, scratch disks, or video editing caches can drastically improve workflow efficiency. You can also use it for large software installations or as a fast storage for frequently accessed files. The key is strategic allocation.
conclusion
Adding a second NVMe SSD is a powerful upgrade that significantly enhances a computer’s capabilities beyond mere storage expansion. It offers unparalleled speed, improved system responsiveness, and the flexibility to organize data for optimal performance, whether for intense gaming, professional content creation, or everyday computing. By carefully selecting the right drive, understanding compatibility nuances, and performing a methodical installation, users can unlock a new realm of efficiency and speed, ensuring their system is not just powerful but also future-ready for the evolving demands of technology.


