Introduction to Game Art: Beginner’s Guide to Sprites and Textures
Introduction to Game Art: Creating Basic Sprites and Textures for Your Game involves designing and implementing the visual elements of a game, including characters and environment features. This guide helps beginners explore the principles and tools needed for crafting fundamental game assets, setting the stage for more advanced artistic endeavors.
Are you eager to dive into the exciting world of game development and bring your creative visions to life? One of the most engaging aspects of game creation is the art – specifically, the design of sprites and textures. This comprehensive introduction to game art: creating basic sprites and textures for your game will guide you through the fundamental concepts and techniques to get started.
What is Game Art and Why is It Important?
Game art provides the visual foundation upon which games are built. It’s about more than just aesthetics; it’s a critical component for player engagement and immersion. Understanding the purpose of game art is the first component of the introduction to game art: creating basic sprites and textures for your game.
The Role of Visuals in Gaming
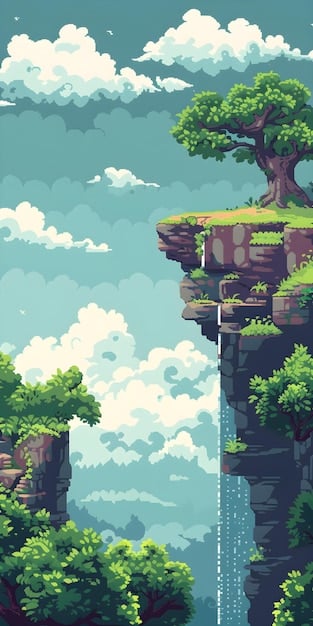
In games, visuals communicate the story, guide the gameplay, and create memorable experiences. Without compelling art, even the most innovative game mechanics can often fall flat. Visuals set the atmosphere and tone. Consider the difference between a hand-drawn indie game and a high-definition AAA title; each has a distinct impact on the player.
Components of Game Art
- Sprites: These are 2D images or animations used to represent characters, objects, or other elements within a game. Sprites are essential for creating visual and interactive elements.
- Textures: These are images applied to 3D models to provide visual details, such as color, patterns, and surface properties. Textures add depth and realism to the game environment.
- Backgrounds: Backgrounds set the stage for the game and provide context for the gameplay. They create the world in which your game takes place.
Understanding these components makes the introduction to game art: creating basic sprites and textures for your game much smoother.
In summary, game art is the visual language of your game, enabling you to communicate with players and create immersive experiences. Sprites, textures, and backgrounds are vital tools. From setting the tone to guiding gameplay, these components shape how players perceive and interact with your virtual world.
Getting Started: Essential Tools and Software
To begin your journey into game art, having the right tools and software is crucial. The digital market offers numerous options, each with its own strengths and features. But which ones are best for creating basic sprites and textures?

Recommended Software for Beginners
- Aseprite: Aseprite is a powerful and user-friendly pixel art editor designed specifically for creating sprites and animations. Its intuitive interface and robust feature set make it an excellent choice for beginners.
- Piskel: Piskel is a free, online pixel art editor that runs directly in your web browser. Its simplicity and accessibility make it perfect for quick sprite creation and experimentation.
- GIMP: The GNU Image Manipulation Program (GIMP) is a free, open-source image editor that offers a wide range of tools for creating textures and sprites. While it has a steeper learning curve than Aseprite or Piskel, it’s still a very powerful alternative.
Basic Equipment You’ll Need
You don’t need expensive equipment to get started. A computer and a reliable mouse or graphics tablet are often enough. A graphics tablet can offer greater precision, especially for detailed work, but it’s not essential for beginners. As you advance, you might consider investing in a larger monitor or specialized drawing tools.
Choosing the appropriate tools can significantly impact your creative process. For creating basic sprites and textures, software like Aseprite, Piskel, and GIMP offer a balance between usability and functionality. Paired with essential equipment like a computer and a reliable mouse, you’ll be well-equipped to begin your game art journey. Remember, the best tool is the one that you find most comfortable and efficient for your workflow.
Creating Basic Sprites: A Step-by-Step Guide
Sprites are the building blocks of many 2D games, bringing characters and objects to life. In this section, we’ll walk you through the step-by-step process of creating basic sprites, and enhancing your introduction to game art: creating basic sprites and textures for your game.
Planning Your Sprite
Before you start drawing, it’s crucial to plan your sprite. Consider its purpose within the game and its overall design. Sketching a rough outline on paper or digitally can help you visualize the final product. Determine the size, color scheme, and key features of your sprite before diving into the creation process.
Drawing Your First Sprite
- Choose Your Software: Open your preferred pixel art software (Aseprite, Piskel, etc.).
- Create a New Image: Set the image dimensions to a small size (e.g., 32×32 or 64×64 pixels).
- Outline: Use the pencil tool to draw a basic outline of your sprite. Start with the main shapes.
- Add Details: Add finer details, such as facial features, clothing, or accessories.
- Coloring: Select a color palette and fill in your sprite with base colors.
- Shading: Add shading to give your sprite depth and dimension. Use darker shades to create shadows and highlights to indicate light sources.
- Refine: Zoom in and make any necessary adjustments to clean up your sprite.
Tips for Effective Sprite Design
- Keep It Simple: Start with simple designs and gradually add complexity as you gain experience.
- Use a Limited Palette: Restricting your color palette can help maintain a cohesive look.
- Experiment with Styles: Try different pixel art styles to find what you like best.
By following these steps and tips, you can create effective sprites that bring your game characters and objects to life. Experiment, practice consistently, and don’t be afraid to try different styles. As you gain experience, you’ll develop your own unique style and techniques enhancing your introduction to game art: creating basic sprites and textures for your game and overall game art.
Texturing Basics: Adding Depth to 3D Models
Textures are essential elements that add visual depth and realism to 3D models in games. Understanding the basics of texturing is a key component in developing realistic video games, and essential to introduction to game art: creating basic sprites and textures for your game.
Understanding Texture Maps
Texture maps are images that are wrapped around 3D models to define their surface properties. There are several types of texture maps, each serving a specific purpose:
- Color Maps (Diffuse Maps): These define the base color of the surface.
- Normal Maps: These simulate the surface of the model, adding more physical realism without changing its base model.
- Specular Maps: These control the reflection properties of the surface.
Creating Simple Textures
Start with simple textures using image editing software like GIMP or Adobe Photoshop. Begin by creating a base color and adding details such as patterns, gradients, or surface imperfections. To add depth, use shading, highlights, and shadows. Experiment with different blending modes and filters to achieve varied effects. Consider the scale and resolution of your texture to ensure it looks good on your 3D model, and finally, save your texture in a suitable format. These textures can enhance the look of your 3D model from a simple base to something of the likes of AAA game quality.
Applying Textures to Models
To apply textures to 3D models, you’ll need a 3D modeling software like Blender or Maya. Import your model into the software, create a new material, and add your texture maps to the appropriate material slots. Adjust the material settings, such as the shader type and reflection properties, to achieve the desired look. Once everything is set, experiment with different lighting conditions to see how your texture interacts with the light.
Mastering the basics of texturing can greatly enhance the quality and realism of your 3D games. A basic introduction to game art: creating basic sprites and textures for your game often overlooks the importance of texturing, so keep honing your skills to stand out.
Animation Basics: Bringing Sprites to Life
Animation is the process of creating the illusion of movement by displaying a sequence of static images in quick succession. When applied to sprites, animation brings characters and objects to life, making your game far more engaging, and is crucial to enhancing this introduction to game art: creating basic sprites and textures for your game.
Key Principles of Animation
Understanding the key principles of animation can significantly improve the quality of your sprite animations. These principles include:
- Timing and Spacing: Key components of animation that create the illusion of time and speed.
- Anticipation: Preparing the audience for an action (such as a character crouching before jumping).
- Follow Through and Overlapping Action: Suggesting that an object’s different parts move at different rates.
Creating a Walking Animation
- Idle Frame: Start with a static frame where the character is in a resting position.
- Contact Frames: Draw the frames where the character’s feet make contact with the ground.
- Passing Frames: Draw the frames where the character’s legs are passing each other.
- Up and Down Frames: Draw the frames where the character reaches the highest and lowest points.
- In-Between Frames: Fill in the gaps between the keyframes to create a smooth animation.
Tips for Smooth Animations
Ensure smooth animations by:
- Use Consistent Timing: Maintain consistent timing between frames for a steady pace.
- Looping: Ensure the animation loops seamlessly from the last frame back to the first.
- Testing: Continuously test your animation in the game engine to see how it looks in motion.
By understanding these principles and techniques, you can create engaging sprite animations that bring your game to life, and take your basic introduction to game art: creating basic sprites and textures for your game to the next level. Be patient, persistent, and always strive to improve.
| Key Point | Brief Description |
|---|---|
| 🎨 Understanding Game Art | Visual foundation enhancing player engagement. |
| 💻 Essential Tools | Aseprite, Piskel, GIMP offer balance of usability. |
| 🚶Sprite Creation | Step-by-step guide to planning and drawing sprites. |
| ✨ Texturing Basics | Adding depth and realism to 3D models. |
Frequently Asked Questions
The first step is understanding the role and importance of game art. This involves recognizing how visuals contribute to player engagement, immersion, and the overall gaming experience. This is fundamental to learning sprite design.
Aseprite and Piskel are both excellent choices for beginners. Aseprite is a powerful pixel art editor with an intuitive interface. Piskel, a free online editor, is accessible and simplifies pixel art creation.
The essential components are color maps (diffuse maps), which define the base color of the model, normal maps, which simulate surface details, and specular maps, which control reflection properties. This provides greater realism.
Start with an idle frame, then draw the contact frames, and then the passing frames. After that, draw up and down frames, and fill in-between frames to ensure that you create a smooth animation.
Restricting your color palette helps maintain a cohesive look, making your art more visually appealing and professional. A limited set of colors ensures that elements look harmonious and don’t clash which makes your game art more visually engaging.
Conclusion
In conclusion, mastering the basics of introduction to game art: creating basic sprites and textures for your game is essential for any aspiring game developer. By understanding the principles of sprite design, texturing, and animation, you can create visually appealing and engaging games.


