Boost Your FPS: A Free Guide to GPU Overclocking for PC Gamers
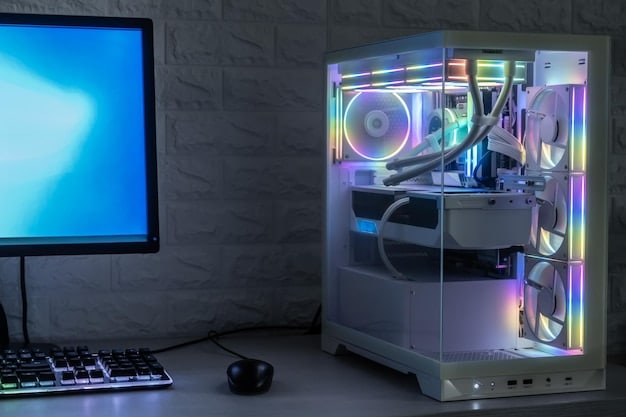
Boost Your FPS: A Step-by-Step Guide to Overclocking Your GPU for Free Performance offers gamers a detailed walkthrough on safely enhancing their graphics card to achieve smoother gameplay, higher frame rates, and a more immersive gaming experience without spending extra money.
Want to squeeze every last drop of performance out of your gaming PC? You can boost your FPS: A Step-by-Step Guide to Overclocking Your GPU for Free Performance. It’s a technical but rewarding process that can dramatically improve your gaming experience without spending a dime on new hardware. Let’s explore how.
This guide provides a simple and safe method to improve frame rates in your favorite PC games by overclocking your graphics card which otherwise requires an equivalent upgrade.
Understanding GPU Overclocking
GPU overclocking is essentially pushing your graphics card beyond its factory-set limits to achieve higher processing speeds. This results in increased frame rates and smoother gameplay, especially noticeable in graphically demanding games. However, it’s crucial to tread carefully, as improper overclocking can lead to instability or even damage to your hardware.
Why Overclock Your GPU?
Besides the obvious benefit of improved gaming performance, overclocking can also extend the usable lifespan of your current GPU. Instead of immediately upgrading to a newer model, overclocking provides a cost-effective way to stay competitive with the latest titles. It’s also a great learning experience that enhances your understanding of PC hardware.
When overclocking, you are essentially increasing the clock speed of the GPU’s core and memory, which leads to faster rendering times. This is particularly beneficial in games where every frame counts, such as first-person shooters and racing games. But it is not only helpful in increasing FPS, but also in decreasing the frequency of stutters and screen tearing!
- Increased FPS: The most noticeable benefit is the increase in frames per second, leading to a smoother and more responsive gaming experience.
- Cost-Effective: Overclocking is a free way to enhance performance without investing in new hardware.
- Extended Lifespan: It can postpone the need for an immediate upgrade, allowing you to enjoy your current GPU longer.
GPU Overclocking is a very common way to squeeze out the last bit of performance on your machine before choosing to upgrade; and although it is safe, it is a process that requires finesse to achieve the best results.

Essential Tools for GPU Overclocking
Before you start, you’ll need a few tools to monitor your GPU’s performance and make the necessary adjustments. These tools will help you track temperature, clock speeds, and stability. Having these monitors helps you understand how much overhead your GPU has before issues such as thermal throttling come into play.
Monitoring Software
MSI Afterburner is the go-to software for many overclockers due to its comprehensive features and user-friendly interface. It allows you to adjust clock speeds, voltage (with caution), and fan speeds. HWMonitor provides real-time data on temperatures, voltages, and fan speeds, helping you keep an eye on your GPU’s health during the overclocking process.
Monitoring software is necessary for testing the stability of your GPU through the use of benchmarking software. These benchmarking software stress tests your GPU with intense loads, designed to expose any instability caused by your overclock.
- MSI Afterburner: Allows you to adjust clock speeds and fan settings.
- HWMonitor: Provides real-time monitoring of temperatures and voltages.
- Benchmarking Tools: Stress test your GPU to ensure stability.
Having these tools will allow you to safely **boost your FPS: A Step-by-Step Guide to Overclocking Your GPU for Free Performance**, and also to know if your graphics card is being pushed too far, either through heat or power limitations.
Step-by-Step Overclocking Guide
Now, let’s dive into the actual overclocking process. This involves gradually increasing the clock speeds and testing for stability along the way. Patience and incremental adjustments are key to achieving a stable and effective overclock.
Incremental Adjustments: Core Clock
Start by increasing the core clock in small increments, typically 10-15 MHz at a time. After each adjustment, run a benchmarking tool such as FurMark or Heaven to test for stability. Watch for artifacts (visual glitches) or crashes, which indicate the overclock is too high. If you notice any instability, reduce the clock speed until the system is stable.
After completing a stress test and finding no issues, it is recommended to play some of your favorite games on max settings. This will help give you real world performance numbers. From there you can decide if the incremental gain is worth the risk of potentially damaging the card by overclocking, or if the performance is just not there.
Testing and Tuning Memory Clock
Once you’ve found a stable core clock, repeat the process for the memory clock. Again, increase in small increments and test for stability. Memory overclocking can significantly impact performance, but it’s also more prone to causing artifacts if pushed too far.
Overclocking your hardware is by no means an easy task, finding the balance between stability and performance demands tedious testing until the maximum level of performance is achieved without pushing beyond the limits of the hardware. Every card is different, so finding the limits is part of the fun of the process!
- Core Clock: Increase in 10-15 MHz increments, testing after each adjustment.
- Memory Clock: Repeat the process for memory, watching for artifacts.
- Stability Testing: Use benchmarking tools to ensure no crashes or glitches.
Throughout the process of overclocking, it is always recommended to keep the monitoring tools open to ensure the hardware levels are within safe margins, this may include temperature, core speed, voltage, and wattage.
Ensuring Stability and Thermal Management
Stability and thermal management are critical aspects of overclocking. A stable system is one that can handle intensive tasks without crashing or producing errors. Proper cooling ensures that your GPU doesn’t overheat, which can lead to reduced performance or permanent damage.
The Importance of Cooling
Effective cooling helps prevent thermal throttling, where the GPU reduces its clock speed to avoid overheating. This can negate the benefits of overclocking. Consider upgrading your GPU’s cooler with aftermarket solutions like liquid coolers or high-performance air coolers.
Increasing the fan speed can mitigate some of the thermal issues that naturally occur when overclocking, however may coolers fail to adequately cool off components if your room is already hot. Consider having ample airflow in your PC case.
Voltage Adjustments
Increasing the voltage supplied to the GPU can allow for higher overclocks, but it also generates more heat. Only adjust voltage if you have adequate cooling and a good understanding of your hardware. Monitor temperatures closely and avoid exceeding safe voltage limits recommended by the manufacturer.
Adjusting these levels is not for entry level people and should not be attempted until comfortable with core and memory clock speeds. Overvolting beyond manufacturer ratings can easily destroy components by creating more heat than cooling systems can dissipate.
Always be conscious of voltage levels when attempting to **boost your FPS: A Step-by-Step Guide to Overclocking Your GPU for Free Performance**.
Advanced Overclocking Techniques
Once you’re comfortable with the basics, you can explore more advanced techniques to further optimize your GPU’s performance. This includes fine-tuning voltage, adjusting power limits, and customizing fan curves. Experiment cautiously and always monitor your hardware closely.
Custom Fan Curves
Custom fan curves allow you to adjust fan speeds based on temperature, providing a more efficient cooling solution. This can help keep temperatures down during heavy gaming sessions without unnecessary noise during idle periods. Many monitoring programs allow you to set these curves, like MSI Afterburner.
Having a custom curve allows the end user to decide how much heat they are comfortable with. Some people value quite, while others value performance, adjusting the fan speed allows you to prioritize those personal preference.
- Fine-Tuning Voltage: Experiment with small voltage adjustments to find the optimal balance between performance and heat.
- Power Limits: Adjust power limits to allow the GPU to draw more power when needed, potentially increasing overclocking headroom.
- Custom Fan Curves: Create custom fan curves to optimize cooling performance and reduce noise.
Overclocking is not a one time effort, often you must go back and re-evalute the performance of the hardware, and adjust the levels accordingly to reach the maximum performance potential.
| Key Point | Brief Description |
|---|---|
| 🚀 Increased FPS | Enhance gaming experience with higher frames per second. |
| 🌡️ Thermal Management | Effective cooling prevents performance throttling and damage. |
| 🛠️ Stability Testing | Use benchmarking tools to ensure system reliability. |
| 💰 Cost Effective | Enhance current hardware performance without immediate upgrades. |
Frequently Asked Questions
GPU overclocking involves pushing your graphics card beyond its factory settings to achieve better performance. With Boost Your FPS: A Step-by-Step Guide to Overclocking Your GPU for Free Performance, you can typically experience higher frame rates and smoother gameplay, especially in graphically demanding games.
Overclocking is generally safe if done correctly. The risks include overheating, system instability, and potential hardware damage if pushed too far. Always monitor temperatures and make incremental adjustments to minimize these risks.
You’ll need monitoring software like MSI Afterburner and HWMonitor to track performance and temperatures. Benchmarking tools such as FurMark or Heaven are also essential for testing stability, while following a Boost Your FPS: A Step-by-Step Guide to Overclocking Your GPU for Free Performance.
A stable overclock means your system can handle intensive tasks without crashing or producing visual artifacts. Run benchmarking tools for an extended period to ensure stability. Also, real world testing through gaming can make a world of difference!
Yes, overclocking can void your GPU’s warranty. Many manufacturers do not cover damage caused by overclocking, so be aware of the terms and conditions before you Boost Your FPS: A Step-by-Step Guide to Overclocking Your GPU for Free Performance.
Conclusion
By following this detailed guide to boost your FPS: A Step-by-Step Guide to Overclocking Your GPU for Free Performance, you can achieve improved gaming performance without spending extra money. Remember to proceed with caution, monitor your hardware closely, and enjoy the process of optimizing your gaming PC.
With the knowledge and tools provided, you are now equipped to delve into the world of GPU overclocking. Happy gaming!
