From Zero to Hero: Build Your First Gaming PC
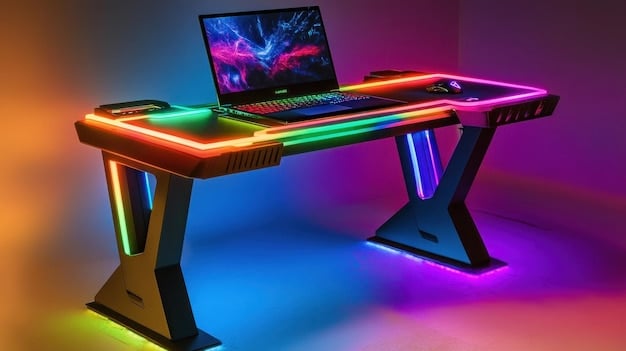
Building your own gaming PC can seem daunting, but **From Zero to Hero: A Beginner’s Guide to Building Your First Custom Gaming PC** simplifies the process. Learn the essential components, step-by-step assembly, and initial setup from scratch.
Embarking on the journey of building your own gaming PC can feel like entering a whole new world. The components, the compatibility, the potential pitfalls – it’s enough to make any beginner hesitate. However, with the right guidance, you can transform yourself **From Zero to Hero: A Beginner’s Guide to Building Your First Custom Gaming PC**.
This guide will walk you through each step, offering clear explanations and practical tips to ensure a smooth and rewarding build. Let’s start building your dream machine!
Understanding the Core Components of a Gaming PC
Before diving into the assembly process, it’s crucial to understand each component’s role. This knowledge will not only make the build process smoother but also empower you to make informed decisions about your PC’s configuration. Let’s break down the essentials.
The Central Processing Unit (CPU)
The CPU is the brain of your PC, responsible for executing instructions and performing calculations. Consider the CPU’s core count, clock speed, and cache size when selecting the right one for your gaming needs.
The Graphics Processing Unit (GPU)
The GPU handles the visual output of your games. It’s arguably the most important component for gaming. When choosing a GPU, consider its memory, clock speed, and support for features like ray tracing.
- **CPU (Central Processing Unit):** The brain of your computer, handling instructions and calculations.
- **GPU (Graphics Processing Unit):** Responsible for rendering graphics and visuals in games.
- **Motherboard:** The main circuit board that connects all components together.
- **RAM (Random Access Memory):** Provides short-term data storage for quick access.
Choosing the right components might seem overwhelming, but doing your research and reading reviews are invaluable. Armed with knowledge, you’ll be well-prepared to customize your PC for optimal performance.
Choosing Compatible Parts for Your Custom Gaming PC
Ensuring compatibility between components is paramount to a successful build. Nothing is more frustrating than realizing a critical part doesn’t work with the rest of your system. Here’s how to avoid common pitfalls and ensure everything works harmoniously. The importance of selecting compatible parts can not be overstated as you follow our beginner’s guide, **From Zero to Hero: A Beginner’s Guide to Building Your First Custom Gaming PC**.
Understanding Socket Types
The CPU and motherboard must have compatible sockets. Intel and AMD CPUs use different sockets, so make sure they match before purchasing. Check the motherboard’s documentation to confirm which CPUs are supported.
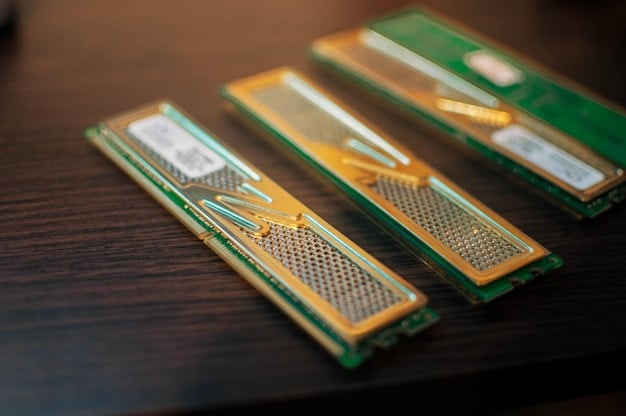
RAM Compatibility
RAM modules also have compatibility requirements. Ensure that the RAM’s speed and type (DDR4, DDR5) are supported by the motherboard. Check the motherboard’s QVL (Qualified Vendor List) for tested and compatible RAM modules.
Take the time to research component compatibility before making any purchases. Consult online resources, read reviews, and use PC part picker websites to confirm compatibility. Proper planning will minimize setbacks and lead to a smooth building experience.
Step-by-Step Guide to Assembling Your Gaming PC
Now comes the exciting part: assembling your PC! This section provides a detailed, step-by-step guide to help you through the process. Take your time, be gentle, and don’t be afraid to consult online resources if you get stuck. This is where the **From Zero to Hero: A Beginner’s Guide to Building Your First Custom Gaming PC** journey really takes shape.
Start by organizing your components and tools. Static electricity can damage sensitive components, so work in a static-free environment and use an anti-static wrist strap.
Installing the CPU and Cooler
Begin by installing the CPU onto the motherboard. Align the CPU with the socket and gently place it in, ensuring it sits flush. Then, apply thermal paste and install the CPU cooler, securing it firmly but not overtightening.
Installing RAM Modules
Insert the RAM modules into the appropriate slots on the motherboard. Ensure the clips on the slots are open, align the RAM module with the notch, and press down until the clips click into place.
- Prepare your workspace: Ensure you have ample space and good lighting.
- Install CPU and Cooler: Mount the CPU on the motherboard and install the CPU cooler.
- Install RAM: Insert the RAM modules into the designated slots on the motherboard.
Remember to consult your motherboard manual throughout the assembly process. Take photos along the way if you need a reference. With patience and attention to detail, you can successfully assemble your gaming PC.
Optimizing Your Gaming PC for Peak Performance
Once your PC is assembled and running, it’s time to optimize its performance. This involves installing drivers, updating software, and tweaking settings to ensure you get the best possible gaming experience. Learn the skills to optimize your new build, and truly go **From Zero to Hero: A Beginner’s Guide to Building Your First Custom Gaming PC**.
Installing Drivers
Begin by installing the latest drivers for your GPU, motherboard, and other components. Drivers enable your hardware to communicate effectively with the operating system.
Updating Software
Keep your operating system, games, and applications up to date. Updates often include performance improvements, bug fixes, and security patches which can help enhance your gaming experience.

Optimizing your gaming PC is an ongoing process. Monitor your system’s performance, experiment with different settings, and stay informed about the latest updates and drivers. With a little effort, you can reach the peak performance with your new rig.
Troubleshooting Common Issues During Your PC Build
Even with careful planning, you might encounter issues during your PC build. Troubleshooting is a normal part of the process, and understanding common problems can save you time and frustration. When you’re **From Zero to Hero: A Beginner’s Guide to Building Your First Custom Gaming PC**, knowing you can troubleshoot issues is key.
PC Won’t Turn On
If your PC won’t turn on, check the power supply connections, ensure all cables are properly connected, and verify that the power switch on the PSU is turned on.
No Display Output
If you’re not getting any display output, make sure the monitor is connected to the GPU, not the motherboard. Also, check the GPU drivers and make sure the monitor cable is securely plugged in.
- Double-check Connections: Ensure all cables are firmly connected to the correct ports.
- Consult Online Forums: Search online forums for solutions to specific issues you encounter.
- Test Components Individually: If possible, test each component individually to identify the source of the problem.
Remember to take breaks and approach the troubleshooting process calmly. Many issues can be resolved with patience and persistence. Don’t be afraid to seek help from online communities or professional technicians if needed.
Future-Proofing and Upgrading Your Gaming PC
As technology advances, you’ll likely want to upgrade your gaming PC to keep up with the latest games and hardware. Planning for future upgrades can help you extend the lifespan of your system without having to start from scratch. That is where **From Zero to Hero: A Beginner’s Guide to Building Your First Custom Gaming PC** helps you to plan ahead when selecting parts.
Choosing an Upgradeable Motherboard
Select a motherboard with a chipset that supports future CPU generations. This will allow you to upgrade your CPU without replacing the entire motherboard.
Investing in a Modular Power Supply
A modular power supply allows you to only connect the cables you need, reducing clutter and improving airflow. It also makes upgrading easier since you won’t have to replace the entire PSU when adding new components.
Think about the long-term when building your gaming PC. Choose components that offer upgrade paths and ensure your system has enough headroom for future expansion. With proper planning, you can keep your gaming PC running smoothly for years to come.
| Key Point | Brief Description |
|---|---|
| 💡 Component Selection | Choose compatible parts based on your budget and gaming needs. |
| 🛠️ Assembly Process | Follow step-by-step guides to assemble the PC carefully. |
| 🚀 Optimization | Install drivers and software to optimize performance of your build. |
| Future Upgrades | Plan for upgrades with a flexible motherboard and power supply. |
Frequently Asked Questions
You’ll need a Phillips head screwdriver, anti-static wrist strap, zip ties for cable management, and potentially a flashlight. Having the right tools ensures a smoother process while **From Zero to Hero: A Beginner’s Guide to Building Your First Custom Gaming PC**.
For a first-time builder, it can take anywhere from 4 to 8 hours. Take your time and don’t rush the process.
Building a gaming PC can often be cheaper, as you can select each component individually to maximize value – plus, you gain experience along the way! **From Zero to Hero: A Beginner’s Guide to Building Your First Custom Gaming PC** focuses on cost-effectiveness.
Thermal paste is a substance that helps transfer heat from the CPU to the cooler, ensuring efficient cooling and preventing overheating.
It’s recommended to clean your gaming PC every 3-6 months, depending on the environment. Dust accumulation can lead to overheating and reduced performance. Maintaining your build is part of the **From Zero to Hero: A Beginner’s Guide to Building Your First Custom Gaming PC** mindset.
Conclusion
Building your own gaming PC is a rewarding experience that provides you full control over its components and performance. Following this **From Zero to Hero: A Beginner’s Guide to Building Your First Custom Gaming PC**, you’re now well-equipped to embark on your own PC-building journey.
With careful planning, patience, and attention to detail, you can create a custom gaming PC that meets your specific needs and budget. Embrace the challenge, have fun, and enjoy the satisfaction of gaming on a machine you built yourself!


